Torgan Base Deck Strategy Guide
A Song of Ice and More Ice
Foreword: Grognack, our spies have found out more about the band of miserable Orcs that have deserted us for the new upstart, Torgan, who has found a Summoning Stone. He is cunning, his warriors are violent, and his mastery over the ice can rival even yours. No word if he means peace or war with us, but perhaps we can find use for some of his troops if we can bring them back under your glorious banner. He could prove very dangerous if provoked.
Second Summoner Overview
Torgan brings a whole new look and feel to the mighty Tundra Orcs, and takes what was one of the most straightforward (read: boring) of the factions and turns them into a complex, multi-threat beast. The deck revolves around Torgan's Minor Ice Walls, which can trample Commons, provide Summoning spots on the opponent's side of the battlefield, protect Torgan's flanks as he enters the thick of battle, and shut down your opponent's ability to Summon with proper placement. Torgan's Commons help flesh out the ranks of the Tundra Orcs, with Ice Armor and the fantastic For Glory to help promote Common play and Crushers to dissuade their opponents from spamming Champions. Many of Torgan's troops are only maximally effective when supported by his Minor Ice Walls, so being able to strategically place them and use them to dictate the tempo of the game is key. Torgan requires strategy and finesse that Grognack can only dream of, and really helps make these icy Orcs a unique and exciting faction rather than the go-to when seeking to crush their opponents with superior firepower and obnoxious Freezes. Be warned, though, that Ugg, Berserkers, and Crushers provide plenty of said firepower to complement Torgan's tricks or Grognack's face-smashing.
Unit Overview
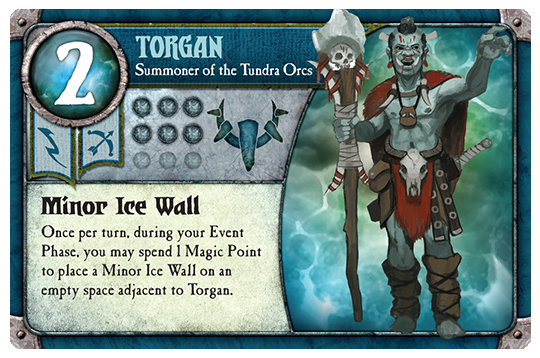
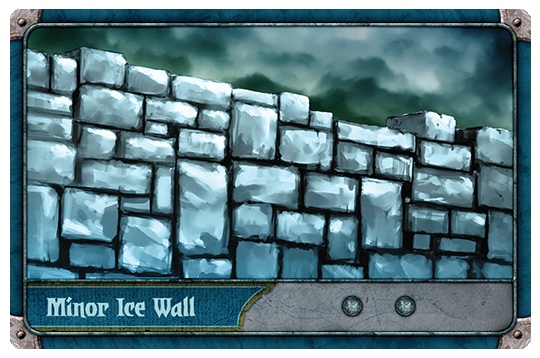
Torgan - The first thing people tend to notice about Torgan is that he looks more like a puny Dwarven or Human Summoner rather than his predecessor, the behemoth Grognack. What Torgan lacks in physical prowess, he more than makes up for in his powerful Ability to create Minor Ice Walls wherever he is on the battlefield. This means that Torgan likes to play the game in midfield, where he can generate new Minor Ice Walls (MIWs) and have advanced Summoning spots to immediately press the attack. This does require a fair amount of care to prevent Torgan from being assassinated as he plays more forward than many Summoners with similar stat lines, so use MIWs and his beefy Commons to protect his flanks. Positioning your MIWs is key, as they block both friendly and enemy movement and attacks so they can greatly help or hinder your advance depending on how much foresight you have. Torgan requires careful management of your Magic, as spamming MIWs likely will reduce your ability to Summon Units to fight for you; try to achieve a balance of MIWs to advance your position and protect your Units, and Summoning to keep the pressure going. Since many of Torgan's Units fight better with MIWs adjacent to them, make sure you're optimizing the Units you're using based on how heavily you've frozen the battlefield.
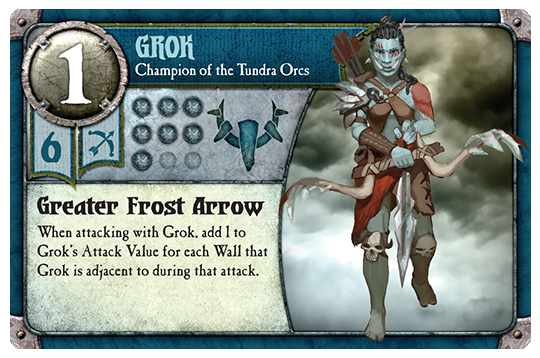
Grok - In addition to the being the first clearly female Tundra Orc Champion, Grok is almost certainly my favorite. While her 1 AV Ranged Attack is not very impressive on its own, her GREATER FROST ARROWS let her boost this up to an absurd 5 AV Ranged if she’s fully surrounded by Walls and is attacking one of them. Note that she gets boosted by enemy Walls too, so against the Swamp Orcs she can stand in the middle of the swamp and hammer an adjacent Unit for up to 6 AV. In normal usage, it’s usually easy to get her into an icy nest where she’s throwing 3 or 4 dice at range and is impossible to flank; enemy Champs and Walls quickly whither under this barrage, and her 7 Life makes her very tough to bring down in the meantime. Grok is best used in close conjunction with Torgan, so that he can replenish her icy fortress whenever it gets whittled down and thus protect her flanks and her combat strength. It is difficult to keep her mobile and shooting at full strength, so use the Glacial Shift events or enemy Walls wisely if you want her to keep up a powerful attack while on the move. She doesn’t offer quite as much utility to Grognack with his limit of 3 static Ice Walls, but she’s a great deal if you can consistently have her shooting 2+ dice at range. I almost always bring her with Torgan.
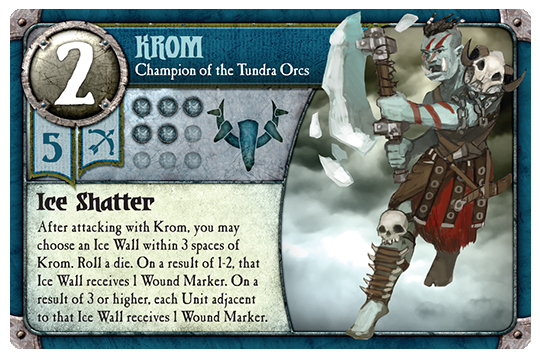
Krom - As a bit of backstory, Krom was originally (mistakenly) playtested as Melee when he’s actually Ranged. When we realized this error, he went from being a niche champion of limited use to one that helps Torgan immensely. 2R/5/5 makes a very nice statline, and the ICE SHATTER Ability is fantastic for Torgan for two reasons: 1) it discourages enemies from crowding the MIWs and thus they can be used for offensive Summoning spots and 2) it combos absurdly well with Glacial Shift for a surprise cluster bomb. Hitting on a 3+ means you don’t want to overly rely on ICE SHATTER, but when it works it means that Krom can potentially deal up to 6 Wounds on a turn if you roll 3 Hits and the enemy surrounded the Ice Wall that you SHATTER. Wounding the MIW if you miss is a bit of a setback, as it means that the MIW will likely be destroyed on your opponent’s turn; make sure it isn’t protecting a crucial Unit or attack lane. The radius of 3 spaces makes it easy to SHATTER far off Walls, so try to keep Krom out of the thick part of battle as his 5 Life can go quickly if he’s under heavy fire. He doesn’t offer nearly as much to Grognack since Groggy already has WALLS OF ICE SHARD and his Ice Walls are a maximum of 3 and immobile, and for a 2R/5 Unit I’d probably rather be a jerk and bring Bragg along for 1 extra Magic to make those Freezes hurt even more. However, his Ability does work on enemy Ice Walls in a TO v TO match, which could be very devastating. For Torgan, I don’t always bring Krom but I think he’s a fantastic deal and really helps maximize the utility of MIWs. Don’t forget that the opponent will have to fall back from forward MIWs in fear of ICE SHATTER if they don’t think they can destroy it. Bringing Bragg along will help that forward threat by making the MIWs tough to kill.
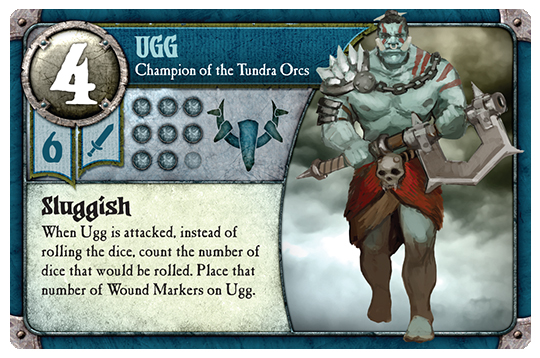
Ugg - The behemoth Ugg is effectively 2 Smashers’ worth of Life, Attack, and Cost, and can wreak havoc with his gargantuan 4 AV until the opponent brings the SLUGGISH brute down. It takes exactly 8 AV to kill him, which is the equivalent to 5.33 Life on a non-SLUGGISH Unit (on average), so he’s not the most long-lived Champ but is pretty terrifying while he’s alive. Make sure to protect his flanks; if your Opponent can only get a single attack on him per turn, he’s probably going to last 3-4 Rounds and can demolish a lot of things in that time. When he’s down to 1 Life, it may be worth getting a final massive attack in with him and then reclaiming him as Magic. It’s interesting to compare Ugg (4/8/6 with SLUGGISH) to his cousin Blagog (5/5/6 with RECKLESS - hits on 4+). They have similar average damage output (4 AV = 2.66 Wounds vs 5 RECKLESS AV = 2.5 Wounds) and similar Life totals (8 SLUGGISH Life = 5.33 “Normal” Life vs 5 Life). Ugg effectively provides more consistent damage and longevity while Blagog could potentially do a lot of damage or far less, and similarly could die in 5 AV worth of attacks or survive far longer than Ugg can depending on luck. Since the opponent can plan exactly when Ugg will die once he’s weakened, try to Summon him at a time for maximum impact and when the Opponent will have a tough time dealing with him -- he’s fantastic in endgame once the Opponent’s out of cheap Units left to deal with him and has to let their Champs get torn to shreds by that massive 4 AV. Tortgan’s MIW don’t directly boost him on the battlefield, but they do let you bring him down like a hammer on the enemy Summoner if you can get some forward MIWs to survive.
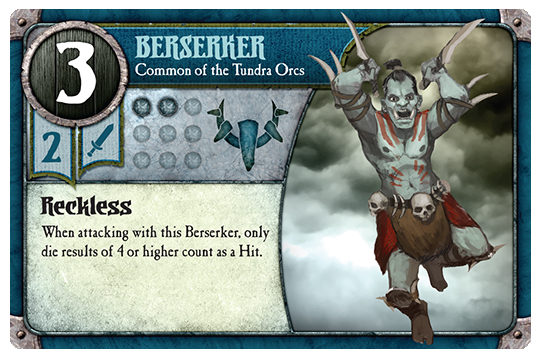
Berserker - These crazed warriors bring an excellent tool to the Tundra Orcs. At 3/2/2 with RECKLESS (hits on 4+), they deal slightly more damage on average (1.5 Wounds) than a standard 2 AV attack (1.33 Wounds), and have the slim potential (12.5%) of hitting 3 Wounds. They’re slightly expensive for their role as Torgan’s base-deck bread-and-butter Unit, but well worth the cost for the damage they can do. They’re also an excellent target for Torgan’s Ice Armor, as they can survive a single Wound without wasting the Armor and save the Ice Armor for what would otherwise be a killing blow. Berserkers work better dealing with high life threats, as trading them for 1-Life 0 or 1 Costers means you’re likely losing the economic battle. They’re excellent Wall smashing Units if you can keep them protected. Similar to the Ugg/Blagog comparison, these Units do slightly more damage on average than the 2AV Smashers (2/4/2 with SLUGGISH), but tend to die slightly faster (2 “Normal” Life vs 4 SLUGGISH Life = 2.66 Life), unless Lady Luck is on your side.
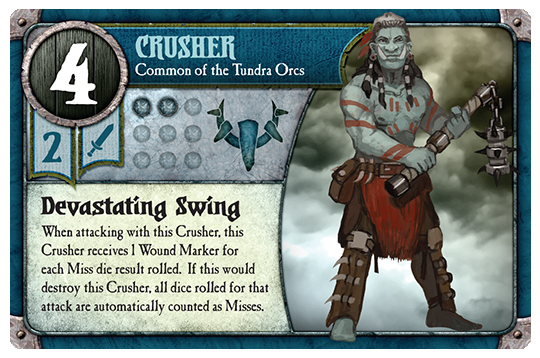
Crushers - The mighty Crusher is one of the most unique, awesome, and ridiculous Units in the game. At 4/2/2 stats, their DEVASTATING SWING Ability costs -2 Magic on these bad boys. When the (unwounded) Crusher attacks, it has a 20% chance of dealing 4 Wounds, a 40% chance of dealing 3 Wounds and dealing 1 to itself, and a 40% chance of smashing its own face in with that massive flail and going straight to your Magic pile. Thus, you are gambling 2 Magic to deal 3-4 Wounds on a choice target 60% of the time and getting no damage but a small refund the other 40% of the time. This makes the Crusher do ~2 Wounds on average, but in a very bimodal distribution. Obviously these are best used against big targets that merit the gamble, but if you can destroy an expensive enemy Champion with 1 or 2 Crushers you just came out way ahead financially. Note that once a Crusher has been Wounded once, it has a 20% chance of dealing 4 Wounds to its target and an 80% chance of killing itself, denying your opponent the Magic, so it’s still worth taking the shot if you can spare the Attack. Trying to combo a single Crusher with For Glory is a very risky play, but if you’re using For Glory on lots of other Commons too it can be a great gamble to use on a well-positioned Crusher to get a lot of extra damage out or at least reclaim your Crusher as Magic. Some players dislike Crushers for their high variance, but they are one of the most effective (albeit unreliable) pieces of anti-Champion technology in the game to date. Whenever playing a Crusher, be prepared to yell something awe-inspiring while gambling on those 4 dice, and then laugh at the mental image of a Crusher missing and smacking itself in the face with that gigantic flail.
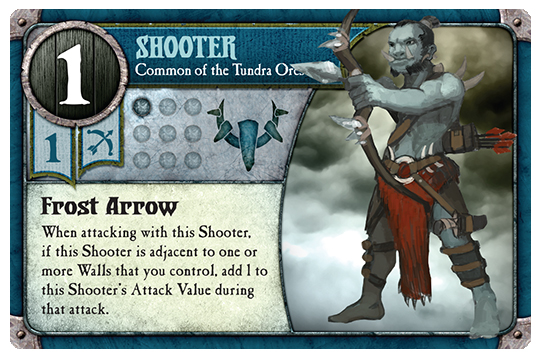
Shooters - 1R/1/1 is a very common (if not super popular) statline for Ranged Commons, but the FROST ARROWs offer a way to boost that attack to 2R if adjacent to any friendly Walls. This makes these Units best on defense in the early game, at least until Torgan can Glacial Shift or generate some forward MIWs to boost aggressive Shooters. They are quite frail, so try to make the damage they deal at range worth losing them easily or else keep them out of the fray. Compared to the TO Shaman (2R/2/1, only deals damage if both dice hit), they can do more reliable damage if they’re using FROST ARROWS, but also die much more easily. They offer perhaps the greatest synergy with For Glory out of any TO Unit (except possibly the Fighter), as they can blast a blocking Unit at Range with 2 AV, and then get the protected Unit with another 2AV Ranged (or hit a big target for 4 AV Ranged), and then are conveniently placed in your Magic pile rather than being left as easy pickings for your opponent. I find Shooters are best used as needed, but they are an excellent addition to your deck for the cases where they shine.
Event Overview:
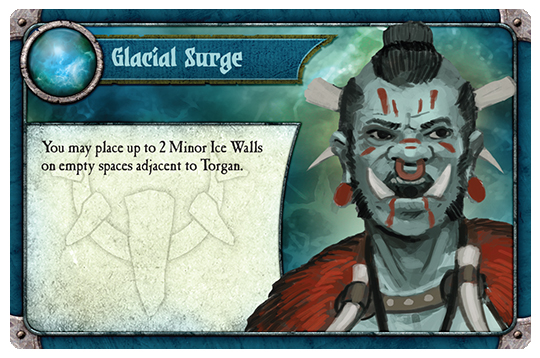
Glacial Surge (x2) - On the surface, this card is effectively a +1 Magic that you have to use to create a Minor Ice Wall, as you could build the event as Magic and bring a MIW later. It also lets you create up to 4 MIWs in a single turn instead of the single one you’re normally limited to if you play both, or you can get 3 out in a single turn if you combo one Glacial Surge with Torgan’s Ability. This combos particularly well with a Glacial Shift or two to catch your opponent by surprise. Note that positioning Torgan well so that he has room to generate the MIWs the following turn while not being too exposed is important, as is making sure that the MIWs you are creating with Glacial Surge will actually be useful. These requirements mean that at times you may have to build a Surge as Magic rather than let it clog your hand; the efficiency of the card makes this tough to throw away, but sometimes is better to spend that Magic as a single optimally placed MIW later than 2 poorly placed MIWs now. Glacial Surge is a great way to protect Torgan’s flanks if involving him in the battle or advancing to place more forward MIWs.
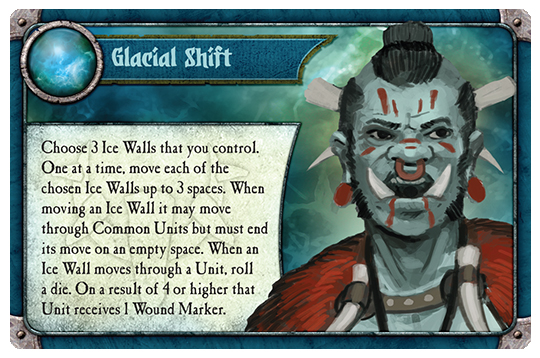
Glacial Shift (x3) - Arguably the key card to most Torgan strategies, Glacial Shift allows you to move MIWs deep into enemy territory to Summon there the next turn, crowd enemy Walls to keep them from Summoning, or trample hapless enemy Commons that get too close to the ice. It combos particularly well with the TO Champions Grok, Krom, and Bragg; the first two can use it for extra offensive potential, while Bragg’s COLD SNAP will keep those deeply advanced MIWs safe from dice rolls of 3 and 4. Although MIWs do not give Magic to the opponent when destroyed, each one is effectively a 1-Magic investment from Torgan, so don’t send them unsupported to be quickly dispatched on the opponent’s turn. Using multiple Glacial Shifts in a single turn to overwhelm the opponent’s defenses can be very effective; try and do this when you have enough Magic to bring out a big offensive from your new front lines the following turns. The threat of Glacial Shift is often enough to keep the opponent from crowding your MIWs with Commons, so try to use that threat and the trampling effect to maximum effect.
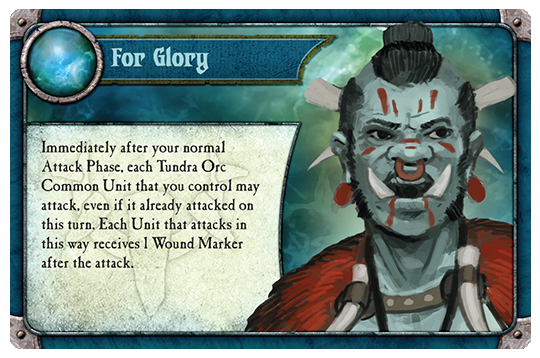
For Glory (x1) - This is an event that can be truly game changing in the right situation, or fizzle if you don’t have enough Commons down on the board in good positions. Using Ice Armors to keep your For Glory targets alive long enough to use it well can be key, or Summoning a batch of fresh Commons to die for the TO cause also make this card dynamite. All TO Commons can benefit to a certain extent from this potential powerhouse, but the best targets tend to be: Shooters (4 AV Ranged and a refund), Berserkers (potential 6 Wounds and sometimes survive the Wound), Crushers (they’re likely to die, but could do a whopping 8 Wounds if you’re quite lucky and thus single-handedly win a game), Shaman (4 AV Ranged with a drawback), Smashers (4 AV and the Wound hurts less for them with their 4 SLUGGISH Life), Fighters (they’ll die, but it gives them another chance for a big Fury combo and you get them as Magic), and Chargers (can rush into position on the Glory turn, and have Life to spare). So effectively, they can be useful with most TO Commons; the only one I’m not fond of using For Glory on is an unwounded Thwarter as they’re often much easier to kill at 1 Life than 2, and they only get a single extra AV out of it. Note that after a successful For Glory turn, there’s a good chance the board will be a lot emptier of both sides’ troops than at the beginning of that turn. If your Commons have all died before you draw For Glory, you may have to build it as Magic, but it’s often more optimal to try and really decimate the opponent on your one Glorious turn and go for the win afterward (or during that turn).
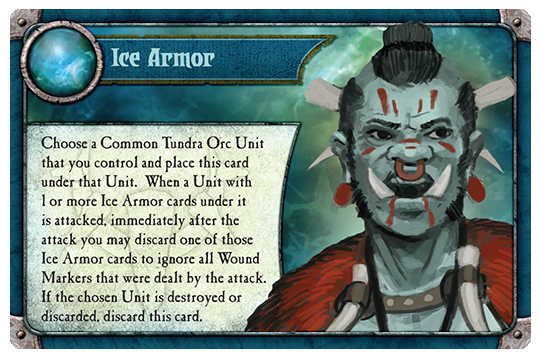
Ice Armor (x3) - Torgan’s other extremely pro-Common card, this Event protects your investments in Commons, denies the opponent Magic, and can set up a big For Glory turn to leave your opponent reeling. It works best with Commons that have 2+ Life, as they can take a Wound (or more) first, and save the Ice Armor for what would otherwise be a killing blow. This makes Chargers, Shaman, Berserkers, and Thwarters excellent targets for the Armor; Smashers can be useful as well, but SLUGGISH somewhat lessens the “real” damage you’re blocking as the opponent doesn’t have to roll for those Wounds. I tend to not Ice Armor Crushers, as it is a wasted Event if they miss and brain themselves (it only protects from enemy Attacks). Shooters and Fighters can be Ice Armored if you know they only have to survive a single attack the following turn, but often the Armor is wasted on them as a shot from the flank will kill them after the Armor is broken from the front. Ice Armored Thwarters can be particularly obnoxious against enemy Champions with their ICE SHIELD Ability.
Hope you enjoyed the read! Next week will be Second Summoner Strategy for Bolvi's demolitions experts, unless popular opinion requests a different SS next.


