Frick Base Deck
The Rejects of the Cave Goblins Hobble to War
Sorry Boss, but ever since Frick got his hands on that shiny stone he’s been all sorts of trouble for us. Lots of us is scared of him, Boss. They even say he gots control of the big bad Feeder now. Lots of useless Goblins has been going to him, Boss, and now he’s turned them into fighters. Well, not as good as your Fighters, but they’s pretty mean all right. Here’s what we know about those uglies:
Second Summoner Overview
The Cave Goblins are the misfits and mongrels of Itharia; they are crude, cannibalistic, bloodthirsty, and barbaric. They are numerous and frail, and seek to overwhelm the opponent with a wave of green rather than use discipline, formations, or longevity. They are underhanded and savage. Thus, when I say that the band of Goblins that have rallied to Frick are the outcasts of Cave Goblin society, understand that these are truly the lowest of the low. Junkies, outcasts, the brain-dead and the infirm are his bread and butter, and he sends them to their deaths even more casually than his forbear Sneeks does. While Sneeks uses his disposable troops to surround and slaughter key enemies, Frick prefers to use his hordes for strategic surgical strikes and targeted death, often from afar. Frick’s Events and his Clingers give his force a huge threat radius, and his Ability lets him boost the Attacks of his despicable swarm. As with Sneeks, Frick seeks to win by using superior numbers and a few explosive Event combo turns to overwhelm the opponent, although Frick is better at assassination and lacks the personal combat prowess of his sly companion. Frick and Sneeks offer fantastic deckbuilding options for one another, and Frick’s love for the unloved makes him a welcome home for many of the Cave Goblins that saw little utility for Sneeks.
Unit Overview
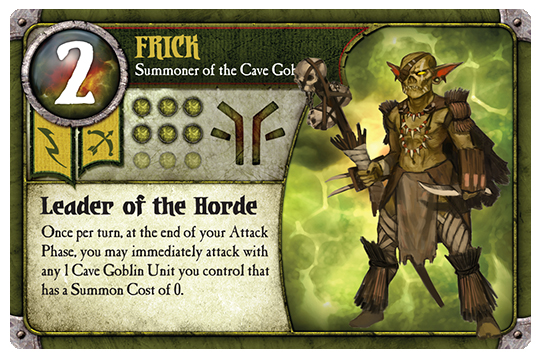
Frick - The noseless, one-eyed, and oft-maimed Frick is a fitting leader for his band of misfits. His stats, 2R/6, are very typical of Ranged Summoners, but he tends to get his hands dirty a lot more than most similar Summoners because of how fragile his troops are and thanks to the presence of his Runts. These Units allow him to blast Melee enemies without fear of retaliation. His Ability, LEADER OF THE HORDE, allows a bonus attack on whichever 0 cost Unit is best positioned. This can provide reliable extra damage output, or can enable massive amounts of damage when combined with his various Events that boost his Commons. Try and set up your 0 costers such that you’ll have a few options for LEADER targets, depending on which dice hit or not during your Attack Phase. As with Sneeks, every early Wound on him likely is a 0 cost Cave Goblin not killed and thus available to hurt your opponent; however, he lacks Sneeks’s SLY Ability to get out of trouble and is not as strong as Sneeks in terms of combat prowess, so he should be played slightly more cautiously. He can use Clingers to cover his flanks in battle if you’ve set it up correctly. Frick’s real power comes from his Events, so be sure to maximize their potential and catch your opponent where they least expect it.
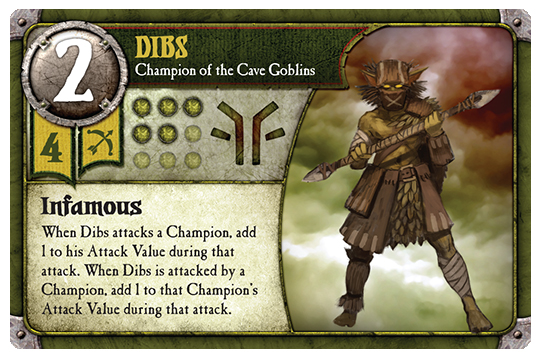
Dibs - With 2R/5/4 stats, Dibs is a great value and is a -1 by SSCF like many of his Cave Goblin Champion peers. His basic 2R attack is the largest Ranged attack available to the Cave Goblins except for Frick (a tie) or when using big Event card combos. When combined with his INFAMOUS Ability, he can routinely throw 3 AV at Range toward enemy Champions and thus make short work of them. However, since they get a bonus attacking him as well, his 5 Life can disappear very quickly. Be sure to maximize his Range and keep his flanks safe to make him last longer. He is phenomenal when combined with Runts, as he can do his 2 or 3 Ranged attack and Melee opponents have to attack the Runt bodyguard rather than the real threat of Dibs. When combined with LEADER OF THE HORDE, Dibs and a Runt can throw 5 dice a turn at an enemy Melee Champion, who cannot strike back against Dibs. Be careful, as Ranged opponents, particularly Champions, will make short work of Dibs even if he’s using Runts as shields. Since he is pretty cheap, it may be worthwhile to let him dish out the punishment against a more expensive enemy Champion, even if you lose him in the process; you still likely came out ahead financially, and the Cave Goblins excel at Common heavy battles once the Champions are all dead.
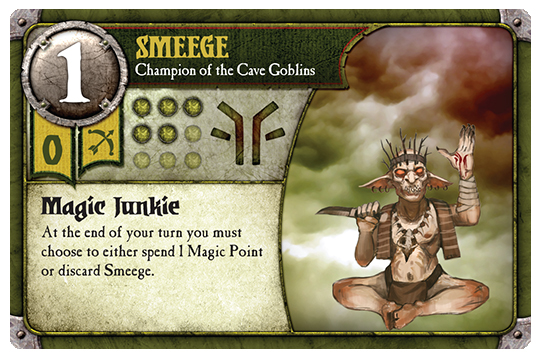
Smeege - With 1R/5/0 stats, Smeege is the first 0 cost Champion in the game, and is eligible for combination with Frick’s LEADER OF THE HORDE and Sneeks’s Goblin Rage and Goblin Rush Events. His Ability, MAGIC JUNKIE, forces you to pay 1 Magic at the end of each turn or he wanders off of the battlefield in search of his next hit. This means that he is an excellent early- or mid- game Champion who you can get down for free and then do some heavy damage with and have him take some Wounds while the board is crowded. Once the board empties out, particularly in the end game, his habit can be prohibitively expensive, so be careful. His stats are worth 3 or 4 Magic by the SSCF, so it is entirely possible to use him for a few turns, let him get heavily Wounded, and then either kill him for Magic or let him wander off to deny your Opponent the Magic and still get a great deal on him. Forcing your opponent to waste Attacks on him and then have him wander off when he’s near death is a great way to let your other Goblins live longer, and if your opponent refuses to attack him for this reason than the 2 Ranged AV per turn he gets with LEADER is usually worth the cost to keep him. The longer he sticks around, the more he winds up costing you, so always be aware of your long-term Magic needs when it comes time to feed the JUNKIE and know when to cut your losses on him.
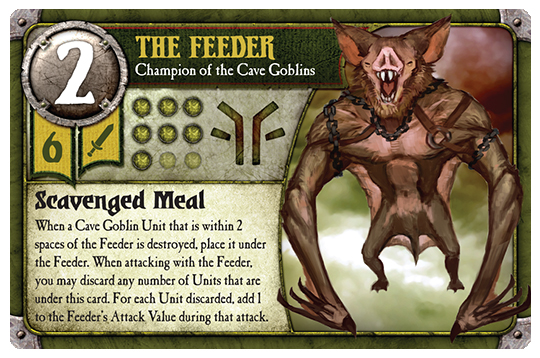
The Feeder - With 2/7/6 stats and a Magic denial/Attack boosting Ability, the Feeder rivals the fantastic Mook for being the strongest Cave Goblin Champion around. The Feeder is tough enough to take on most enemy Champions, but his real value is his amazing SCAVENGED MEAL Ability. This glorious treat makes any Cave Goblin (friendly or enemy) that dies within 2 spaces of the Feeder get snatched away for a later snack, thus denying the Magic to your opponent (typically). This can then be spent to boost the Feeder’s Attack by 1 for each Goblin consumed, so he can get some dreadfully big attacks going. Since one of the primary weaknesses of the Cave Goblins is the amount of Magic their hordes give to their opponent when slaughtered, the Feeder can single-handedly win games by shutting down that torrent of free Magic and thus starving your opponent’s economy. In one game as Torgan, I had 8 Magic denied to me by the Feeder, which turned into 8 bonus AV that trashed the only Champion I could afford and then Torgan himself. The main limitations of the Feeder are positioning and cost; 2 spaces is a tight requirement for keeping him able to use SCAVENGED MEAL without getting killed for the Magic underneath him , and 6 Magic is a hefty amount for the Cave Goblins to muster. His high price tag can make it hard to get him down at the optimal time, because if your troops are all dead by the time he arrives he is a lot less effective. Even still, a 2/7/6 Champion is a force to be reckoned with, and he usually earns his keep. Choosing between him and Mook can be a tough choice; Mook can help you win by increasing your accuracy within a large radius, while the Feeder shuts down your opponent’s economy within a small radius and can give you extra Attack dice. Both can be amazing, but keep in mind that 11 Magic is a huge amount for the Cave Goblins to spend on 2 Champions before you decide to bring both.
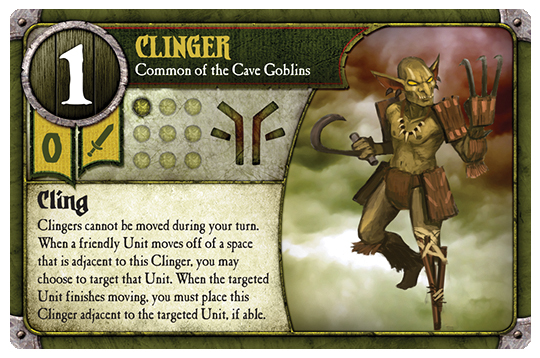
Clingers - Clingers are one of the two 1/1/0 Commons that Frick brings along, and are one of my personal favorite Units in the game. Thanks to CLING, they are unable to move during your turn, but can grab a ride on any adjacent friendly Unit that is moving. They can CLING multiple times per turn, and multiple Clingers can CLING to the same Unit if there are enough landing spaces for them. Given the combination of the same Clinger CLINGing to multiple Units in a turn, Events like Hordes of Rabble or Goblin Rush, and Units like Beast Riders and Climbers, Clingers have a truly absurd threat radius and can often sneak in for completely unexpected attacks with clever positioning and usage. Clingers offer enormous potential if you are creative in your utilization of them. However, their inability to move on your turn is a major drawback, and it can be frustrating to have a Clinger blocking your own Unit from moving in the preferred direction. If the opponent kills the Clinger’s ride, it may become stuck and unable to do anything until the opponent dispatches it at their leisure. Therefore, being careful with your use and placement with Clingers is key. Placing your Walls in an “L” formation (like how a Knight moves in chess) can help you Summon 1 or 2 fresh Clingers adjacent to a fresh carrier Unit. When combined with Beast Riders or Clingers, you can get a lot of surprise dice on a Unit. Note that Clingers can hop on a moving Unit if it passes by, even if it did not start its movement adjacent to them, so try and use that to get Clingers to better locations or out of being stranded. Clingers are excellent Wall crowders as well, and in Sneeks can be great with a Goblin Rage + Goblin Horde Attack combo to tear Walls to shreds using fewer movements. They also are great for bringing along with a Champion or Summoner to protect the flanks in battle.
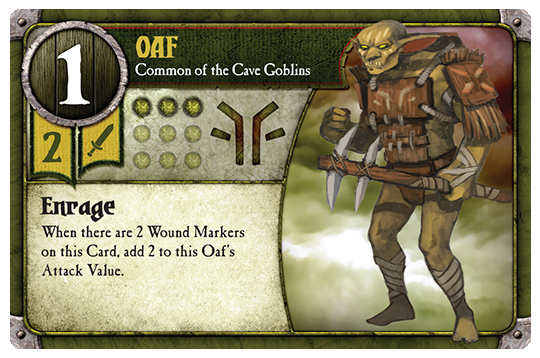
Oaf - The big, stupid, likely brain damaged Oafs are an excellent value at 1/3/2, which essentially become 3/1/2 Units when ENRAGE triggers. 3 Life is huge in a Cave Goblin Common and can be tough to take down in a single turn; the fact that the Oaf will retaliate for 3 AV if ENRAGED makes your opponents very wary of attacking them unless a kill is practically assured, so they can force inefficient plays or deter attacks. The 3 Wounds it takes to actually fell an Oaf are potentially 3 0 costers saved, which is a big deal for the Cave Goblins. Oafs work well with all of Frick’s Events: Join the Horde brings them out for free and lets Frick use LEADER OF THE HORDE on them (even better if ENRAGED), Throw Rocks makes them Ranged and can potentially sling 5 AV at Range if ENRAGED (and do that again with the LEADER/Join the Horde combo), and Hordes of Rabble lets them move far and attack in conjunction with the 0 costers they’re hopefully drawing fire from. A favorite trick of certain players is to use Frick or another Unit to whip an Oaf into an ENRAGED frenzy, and then drop those 3 AV on a big target. This can backfire if those dice Miss or accidentally kill the Oaf; a 1- or 2-Life Oaf is much easier for the opponent to dispatch in one turn. Summoning Oafs at full price should be done sparingly as the Cave Goblins often hardly have enough Magic for their Champions alone (since they rarely Build Magic). Frick can get up to 6 Oafs out for free using Join the Horde, so try and maximize that if possible. However, be wary of hand clogging and be aware that sometimes it’s better to not pursue the maximum Join the Horde/Oaf combo.
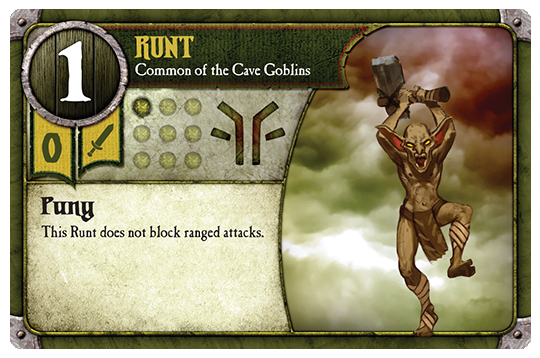
Runt - These little guys are the other 1/1/0 Common that Frick brings to bear, and they are PUNY fellows that are essentially mini-Fighters who lack the Fighter’s bonus attacks and instead are too short to block Ranged attacks. Unlike Fighters, they can kill a blocking Unit during the Attack Phase and then a Ranged Unit can shoot through, but they also don’t give the bonus attacks that are so useful with Fighters. PUNY is a double edged sword; Frick, Smeege, Dibs, Scagg, Slingers, Climbers, and any Common with Throw Rocks can lob their shots over the Runt’s head and potentially get a lot of dice from the same direction, but they are not safe in return from the enemy’s Ranged Attacks. Therefore, they are fantastic to use against Melee-heavy enemies or for big Throw Rocks or Goblin Rage/Goblin Horde Attack turns in Sneeks, but never forget about the possible retaliation. Runts can be very effective Wall crowders while you use bigger Ranged attacks shot over their PUNY heads, plus the Walls can’t fight back.
Event Overview
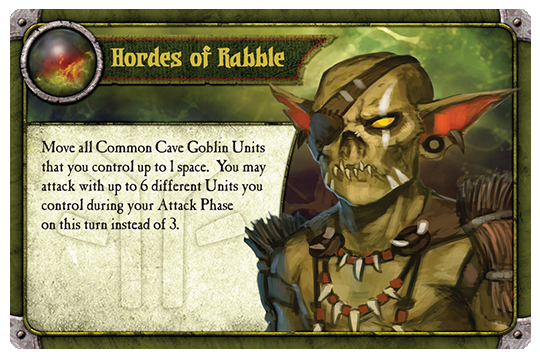
Hordes of Rabble (x3)- This Event combines a distinctive Movement and Attack bonus into a versatile card that can really shine in the right situations. Moving every Common Cave Goblin (other than Clingers) you control 1 space can be a great tool on offense, defense, or for Wall crowding, and if you combine 2 or 3 of these you can readily bypass many defenses for a quick assassination. While Clingers cannot move directly with Hordes of Rabble, it is possible to use all of the free movements it grants to have your Clingers CLING across great distances with careful placement and activation. It is also possible to sidle a Beast Rider over a space into an unprotected lane that they can now use RIDER to charge down. The Attack bonus from Hordes of Rabble can be tough to fully utilize as the cheap Cave Goblins die so quickly and it can be hard to have that many attacks set up, but it’s well worth it if you get a few more attacks in on useful targets. If you bring along Fighters and Reeker, you could potentially get 10 Attacks in for a single turn (including LEADER OF THE HORDE) - that’s likely going to result in a lot of pain for your opponent. While I typically play Hordes for the movement bonus, it is often worth playing for either of its two effects in isolation if you’re getting a lot of value from that. Combining two or three Hordes of Rabbles in a turn does limit how many bonus Attacks you’re getting during the game, so make sure it’s worth the extra movements (for me it often is).
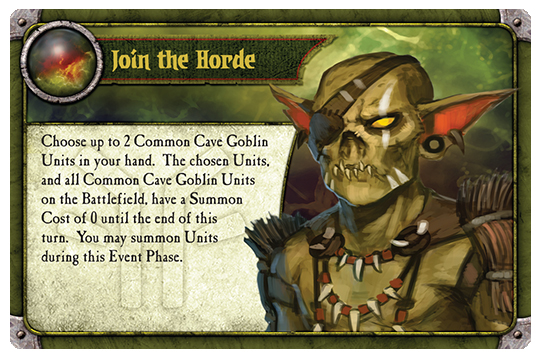
Join the Horde (x3) - A phenomenal card, this Event is basically Reinforcements without being a Catch-Up Event. Oafs, Berserkers, Climbers, and Beast Riders all are great deckbuilding options in Frick since he can bring up to 6 of them out for free if he has the right card draws; this can save you a lot of Magic during the game. The secondary effect, that the chosen Commons in hand and all Commons on the board are 0 cost for that turn, allows Frick to pick any of his Commons for LEADER OF THE HORDE that turn. When combined with ENRAGE, ASSAULT, or Throw Rocks, this can lead to a lot of bonus dice on a key target, and is often a vital part of successfully pulling off an assassination with Frick. Note that Join the Horde also allows you to Summon the new Horde members adjacent to a fresh Wall, so use that for surprise attacks. While I typically try and maximize the economic value of Join the Horde, don’t be afraid to Build it as Magic or play it for a single expensive Common in certain situations; for instance, getting the Feeder out next turn can often be a stronger play than getting a Climber or two out for free this turn, but it does depend a lot on board state and how close you are to decking. It is extremely rare when I’d want to use multiple Join the Hordes in a single turn, but it can combo quite well with Hordes of Rabble and Throw Rocks even if you’re not actually summoning free Units with it if you want to get a key non-0 coster affected by LEADER OF THE HORDE.
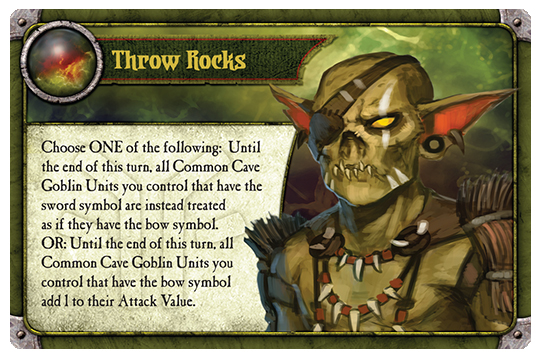
Throw Rocks (x3) - The Event either makes all of your Commons Ranged for the turn, or boosts your Ranged Common’s AV by 1 for the turn. Thus they typically are used with Slingers and Climbers to get a big Attack boost for a turn and hurl death from afar, or played in multiples to make the non-Ranged Commons all Ranged and then boosting their attacks. Thus, playing all 3 Throw Rocks in a turn can either make your Slingers and Climbers blast 4 AV from Range, or your other Commons gain Range and all get 2 bonus AV. This is particularly effective with Runts since multiple Units can attack from the same direction, or with ENRAGED Oafs who can potentially throw 5 dice at Range. The triple Throw Rocks with Berserkers gives an interesting choice; they can either throw 4 dice at a single target at Range, or use ASSAULT to hit all adjacent enemy Units for 4 dice apiece. Throw Rocks is often central to Frick’s success if pursuing assassination; it is particularly effective to combine 2 or 3 Throw Rocks with either Hordes of Rabble for bonus movement and attacks, or with Join the Horde for some fresh Commons or choosing a non-0 coster for LEADER OF THE HORDE huge bonus attacks. There are times where a single Throw Rocks is useful for the Range it bestows, but often the big turns with multiple Throw Rocks are worth waiting for if it won’t clog your hand too badly. This Event is fantastic, and has one of my favorite thematic explanations in the game:
“You, Horde! Throw rocks at the enemy!”
“We already is, boss!”
“Oh… Well, throw more rocks!”


