Bolvi Base Deck Strategy
Nobody Tosses a Dwarf!
Foreword: Guildmaster Oldin, the rumors are true; our dear friend Stonemaster Bolvi has located one of the precious Stones and has joined the Wars. With the addition of his powerful lieutenants, our own prowess shall surely redouble! Bolvi has figured out how to mobilize our mighty Assault Towers to call them onto the battlefield, and has combined his fathomless knowledge with the mystical energies of that precious Stone to imbue his siege engines with deadly force.
There are rumors, though, that rage and grief have overwhelmed his mind. Rumors of betrayal from a mysterious lover, of cold-blooded murder, and of a bloodlust that does not befit one of our race. If he should ever see us as an enemy, it may lead to dark days among our proud Guild. We must be cautious.
Second Summoner Overview
The Guild Dwarves, led by the tough-to-kill Oldin and having access to some of the best Events and Units in all of the Summoner Wars, have long set the standard for simple, easy-to-use raw power, and were arguably one of the strongest factions in Itharia because of this. They also were, by many accounts, the most straightforward and boring faction to play, and have been the go-to for those seeking decks with that slight competitive edge. Bolvi, their Second Summoner, shakes up that metagame aspect quite strongly by bringing a much more unique, flavorful, and skill intensive aspect to the Guild Dwarves. His deck retains the heavy Wall focus of his peer Oldin, with Dwaf and Destabilize to tear down Walls and his Architects to prop up his own ones; even his Ability is focused on Walls. However, the true centerpiece of Bolvi’s deck, and what makes him a much more interesting take on the Dwarves than Snoozemaster Oldin, is the mighty Assault Tower. These powerful Common Units are incapable of moving (usually) after being placed, but can rain death on foes from afar and survive major abuse. Bolvi’s three Upgrades allow boosting these Units to truly deadly potential; judicious use of Upgrades and Towers are both key to Bolvi’s success. Using these somewhat defensive Units in an offensive manner can be a fun challenge, and Bolvi’s central emphasis on these Units makes the mighty Gror far from the instant-include he typically is for old man Oldin.
Unit Overview
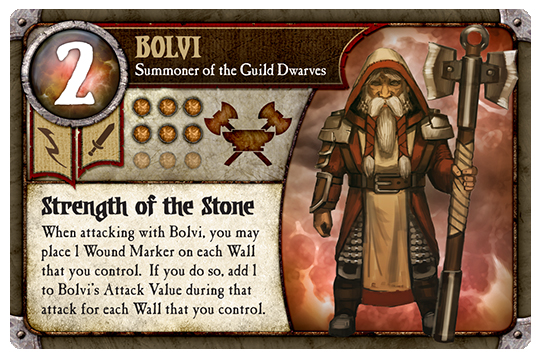
Bolvi - Based on stat lines alone, Bolvi is one of the weakest Summoners we’ve seen to date. At 2 Melee and 6 Life, he has lower stats than all existing Melee Summoners, and has the same stats as most Ranged Summoners without him actually having Range. There are two reasons for this: his Events are some of the strongest in the game when used correctly, and his Ability allows him to get up to 5 AV if he’s willing to damage his own Walls. STRENGTH OF THE STONE effectively means that he starts the game with decent 3/6 stats, and ends it with 5/6 stats if you can keep his Walls safe from destruction or his own Ability and Destabilize events. Architects are great to combo with him to keep your Walls from crumbling if he is aggressively attacking. Typically Bolvi is best played just behind the front lines, ready to pop in for an opportunistic blow if a juicy target wants to tangle. Be sure to use those Towers and Oath Sworn to keep him safe.
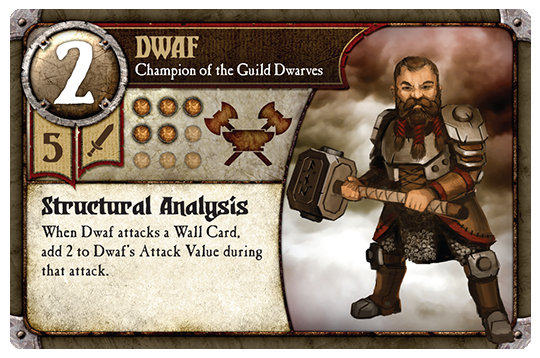
Dwaf - Dwaf has the unfortunate position of having an easily mocked name and being the big brother of one of the least popular Guild Dwarf Units. At 2/5/5 stats, he is far from the powerhouses Gror and Baldar in terms of physical prowess. However, his STRUCTURAL ANALYSIS boosts that attack up to 4 AV when he’s striking Walls, and this Ability that is somewhat situational on a 1-Life Common becomes a quick route to Wall destruction on a 5-Life Champion. Unassisted, Dwaf can topple a Wall by himself in 3 or 4 turns, and cannot be easily shaken by the foe if he’s at all protected. He is not fantastic at fighting off enemy Champions due to his lackluster stats, but is more than enough to deal with Commons that threaten his Wall bashing enterprise. With support or some of the other many Guild Dwarf options to blast apart Walls, Dwaf can engineer massive blowouts as the enemy has no way to Summon further troops amongst the rubble that was once their Walls.
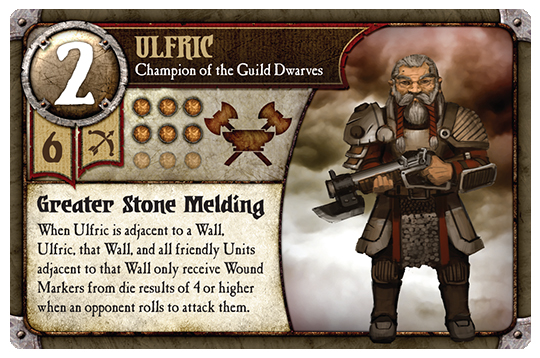
Ulfric - I’m slightly in love with the artwork on Ulfric thanks to a mean-looking and very unique weapon. It looks to be a bayoneted weapon that’s a cross between a shotgun, a blunderbuss, and a cannon. Ulfric’s 2R/6/6 stat line is a personal favorite of mine, as it’s a solid ranged attack and sturdy enough to last quite a while if you keep him out of excess danger. GREATER STONE MELDING is a great Ability if you can protect some key Units with it alongside Ulfric, and with Assault Towers or Grundor’s Tower you can potentially be blasting 6 dice a turn at range and have all of your front line protected. He offers more to Bolvi than to Oldin because Oldin already has STONE MELDING to protect his own skin, and Bolvi tends to prefer tighter formations and more Units on the board than Oldin does. Note that Ulfric’s Ability also works on enemy Walls, which will keep your Units safe on the offensive but does make it slightly harder to tear down an enemy Wall that you’re crowding since the Wall is protected too. Be sure to intimidate your opponent by pointing out that deadly weapon whenever you Summon Ulfric.
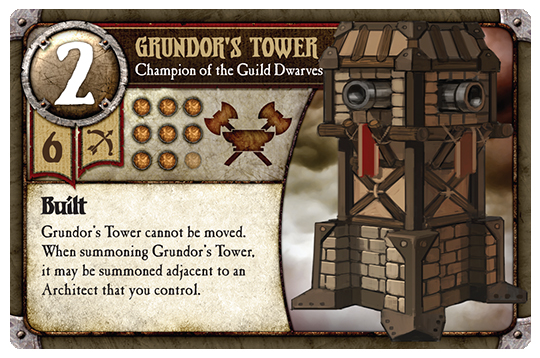
Grundor’s Tower - The Big Daddy of Assault Towers, Grundor’s Tower has a behemoth 2R/8/6 stat line with the BUILT Ability. This is by far the sturdiest Ranged Unit in the game thus far, particularly since GT can be protected by Strengthen Structures and Ulfric’s Ability, and can be REPAIRed by Architects. Note that Accelerated Construction allows you to fetch GT from your deck, and you can Summon it during your Event Phase even if it’s already in your hand. A particularly nasty combo is if you use Accelerated Construction to build a new Wall on your front row and then plunk GT right next to it, protecting one of its flanks or else giving you a spot for attacks deep in enemy territory. You can also charge an Architect deep into enemy territory with enough protection to keep him alive for a deep-territory GT summon the following turn. His 6 cost reflects a -2 Ability, as opposed to BUILT being -1 for Assault Towers, because if you’re not careful you can get an 8 Life Champion down that has absolutely nothing to attack all game since it can’t move and your opponent will just give it a wide berth. Many people choose to remedy this by placing the Colossus Upgrade on GT; however, if you are careful with your initial placement of GT it can be even more effective to put Mortar or Turret Upgrade on GT for the extra threat radius and damage. The best Upgrade for GT is typically situational, so don’t assume that Colossus is always best played on the big boy.
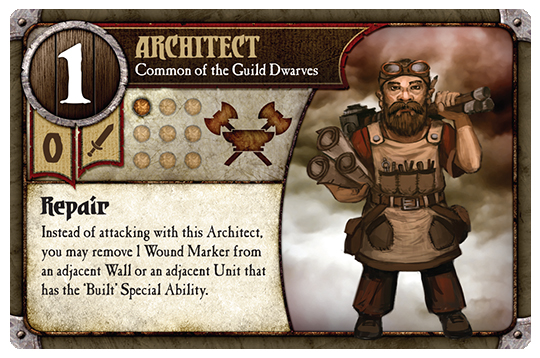
Architect - At 1/1/0 stats and an Ability that centers on Walls (and Towers), these Units are a logical comparison to Engineers. While I find Engineers to be pretty situational (although they can be dynamite in those situations), Architects are a cornerstone of Bolvi’s deck due to their Ability to REPAIR damaged Towers and Walls, their use as a mobile Summoning point for Towers, and for their 0 cost. They can keep your Assault Towers and Grundor’s Tower going for much longer, particularly if you’re protecting an expensive Upgrade. They can help keep Bolvi’s own Walls from collapsing if you’re aggressively using STRENGTH OF THE STONE or decide to play Destabilize. They’re also a cheap blocker if you need them, although with only 1 Life it’s often going to feed Magic to your Opponent at the expense of their key usefulness. I prefer to keep an Architect or two safe behind the lines of Assault Towers and use them as needed throughout the battle; I try to rarely Summon more as further ones shouldn’t be needed if you play them safe.
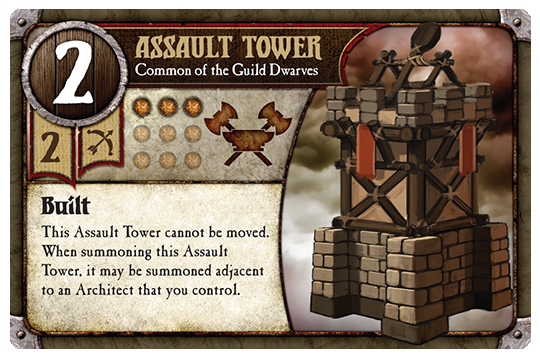
Assault Tower - Bolvi’s signature Unit, these 2R/3/2 Towers are immobile but can rain down death from afar. With Event support from Accelerated Construction, Strengthen Structures, Expand, and the three Upgrades, all but one of Bolvi’s events are specifically designed to make these Assault Towers as awesome as possible. Constructing a line of Assault Towers across the middle of the battlefield, particularly with Expand, can allow you to mow down enemies without them having the option of flanking your towers. An Architect or two can then keep your line alive for a long time. A word of caution, 3 Life goes quickly if you do allow the Tower to get flanked, and their immobility means they can neither advance nor retreat even if the battlefield requires it. It can be particularly effective to Summon an Assault Tower 3 spaces away from an enemy Wall, so that you can slowly destroy it if they don’t respond, but they cannot flank your Tower with fresh Summons. Be aware of the Tower’s “blind spots”, as they cannot attack diagonally (without the Turret Upgrade, that is), so enemies can end a move diagonally adjacent to an existing AT and then waltz past on their next turn. Careful placement or reinforcement with further Units can prevent this scenario.
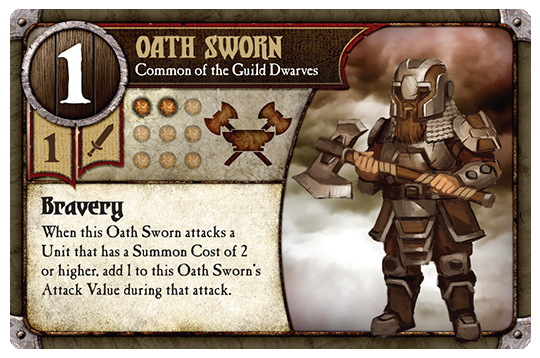
Oath Sworn - These useful Units have a nice statline, 1/2/1, and a fantastic Ability, BRAVERY, that makes them a 2/2/1 against Units with a Summon Cost of 2 or more. This makes them a cost-effective response to Champions and high cost Commons, but they don’t get the boost against Summoners, Conjurations, or lowly cheap Commons. I typically use them sparingly in Bolvi’s deck, as they really don’t synergize well with the rest of his theme and lack the longevity, range, and consistency of Assault Towers. That being said, they’re a great way to cheaply flank and smash an encroaching Champion, or to protect your own flanks as they’re more mobile than ATs and sturdier than those puny Architects. Of all of Bolvi’s cards, I think these might be the only one that really do more for Oldin than for Bolvi, as I think they’re a great alternative for Spearmen and combo well with Defenders.
Events Overview
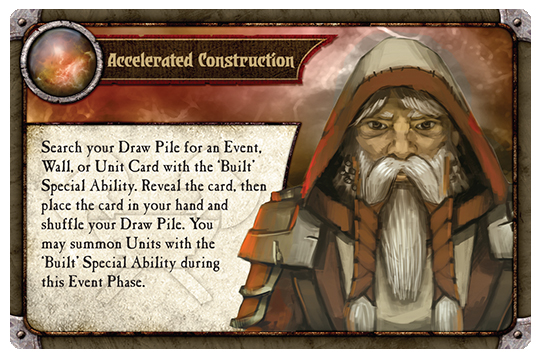
Accelerated Construction (x1) - The flexibility of this card is its main power. Need an extra Wall as a Summon point or to power up Bolvi’s STRENGTH OF THE STONE? Done. Need that crucial Upgrade on your fresh-built Tower? Done. Fearing the hammer dropping on your forward line of Assault Towers? Grab Strengthen Structures. Your opponent just put down all 3 Walls and you still have just one? Come here, Destabilize! Since you can summon any BUILT Unit during the Event Phase, it allows you to set up fun combos like grabbing an Assault Tower to Expand it, or dropping a Wall and Grundor’s Tower together, or chaining together a new front line thanks to several Assault Towers, Expand, and a fresh Wall. There are times to build this card as Magic as it’s more valuable that way, but be creative and look for fun possibilities to get the most out of it.
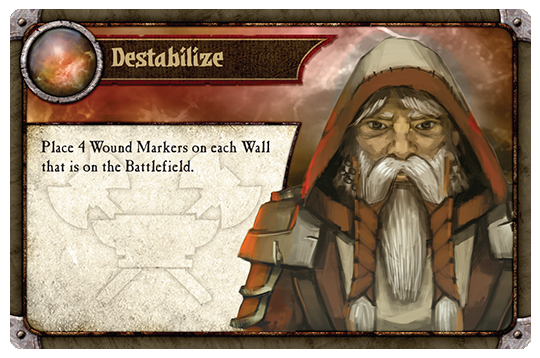
Destabilize (x1)- This Event is typically built as Magic summarily when I have it, but there are a number of exceptions. If you’re planning on going with Wall destruction, it’s a must-have. If my opponent gets all of their Walls down early and I don’t, I often will play it so that I can start putting heavy pressure on their Walls and force the game onto my terms. I try and avoid playing this if it damages our Walls evenly, but between Ulfric, Architects, Strengthen Structures, and the Towers, Bolvi can keep his Walls pretty safe if he needs to. If I’m not pursuing Wall destruction, I find the Magic is more often useful, but it’s definitely a card to consider playing when you draw it. A skilled opponent familiar with Bolvi’s tricks may want to hold onto their Walls rather than put them down in fear of Destabilize, so use that to your advantage. Sometimes if you bury it in your Magic pile and don’t spend it until much later, you can clog their hand in fear of Destabilize without clogging your own. This card can also set up a surprise assault in what was previously a safe lane if you destroy your own or your opponent’s Wall during the Event Phase and then launch a surprise attack through the rubble. With STRENGTH OF THE STONE, that can win games easily.
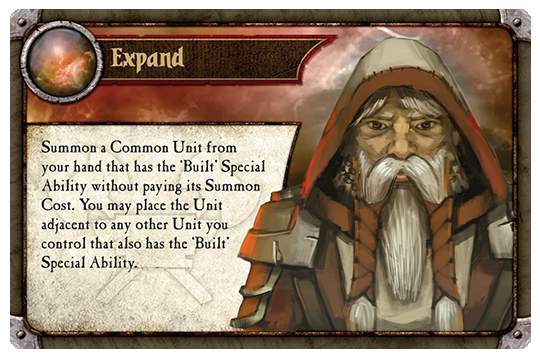
Expand (x2) - This card give two benefits: it is worth +1 Magic to Expand an Assault Tower rather than build this as Magic and hard Summon an AT, and it allows you to get much better positioning with your new AT than might otherwise be possible. The latter is probably the more important factor, as a poorly placed immobile Tower is a waste of Magic even if you Expanded it. I try and always use my Expands to maximum efficiency, so to prevent hand clogging I like to add an extra Assault Tower or two into my deck. Note that this Event combos nicely with a hard charging Architect if you can keep him safe for a Tower bulkhead next turn in enemy terrain, or with fresh Walls (possibly thanks to Accelerated Construction). Chaining multiple ATs together can create a nigh-indestructible battery.
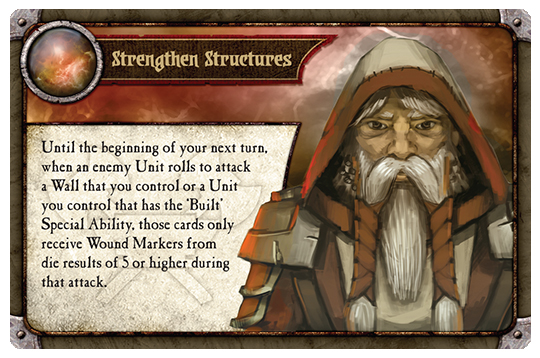
Strengthen Structures (x2) - Assuming statistically correct dice rolls, this card can effectively double the life of your Towers and Walls for a round. This is undeniably useful, and if you time it for when your opponent has no other targets, you will get the maximum benefit. That being said, you only have two of them in your deck, and if you time them poorly due to having few Towers in harm’s way or having other targets for your Opponent to hit, you may wind up wasting a handy Event. Depending on the board state, I will sometimes build this as Magic and use that extra bit to press the attack more rather than hunker down with Strengthen Structures. It’s important to recognize when this Event will really shine and when it should be either saved or built -- it’s not as straightforward as many Events, as this can really save your bacon at times and yet at other times it will fizzle.
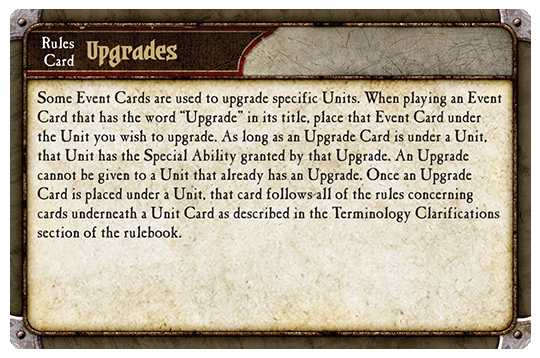
Upgrades - The heart and soul of Bolvi’s deck lies in his Upgrades, and it is why the Towers are far less effective in Oldin’s deck. Upgrading a Tower gives it greater reach and damage potential, but it also will be an extra Magic for whoever destroys it. I try and use all three Upgrades to maximum effect, and would much rather build my other Events as Magic if I have to than the Upgrades. Timing and placing your Upgrades well is the hallmark of a skilled Bolvi player, and without them you may find yourself unable to get traction and ultimately lose as your position is overrun.
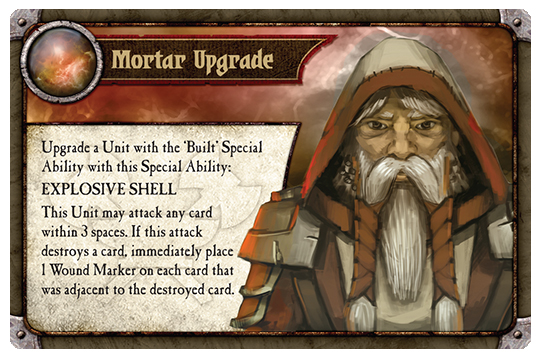
Mortar Upgrade - Lobbing mortar rounds that explode on impact is undoubtedly fun. Note that the Upgrade allows you to target any card within 3 spaces, and that it does not require line of sight or even straight lines for targeting. Thus, placing this Upgrade on a Tower in midfield or on the opponent’s side, particularly if that Tower is named Grundor, can be a potentially deadly play as the opponent has nowhere safe to hide. It effectively doubles the number of spaces a Tower can target, and its range is extended even further thanks to the explosive effect. It can often be advantageous to target the weakest Unit in a pack, and let the collateral damage do the bulk of the work. I’ve been known to run injured Oath Sworn up to a key target, hit the target for 1 or 2 AV, and then detonate that BRAVE soldier with an EXPLOSIVE SHELL to deal extra damage and get him back as Magic. This Upgrade will utterly decimate the Cave Goblins and anyone else fond of flooding the board. However, be careful with it as the Tower it’s attached to can damage itself too with that collateral damage.

Turret Upgrade - Firing two diagonal spaces away was a power previously limited to the niche 4-cost Jungle Elf Common, the Jungle Guard, and is a fantastic way to get a surprise assassination in. Combined with a rapid shot reminiscent of the Mountain Vargath Quen’s CHAIN LIGHTNING, the Gyro Stabilized Tower can quickly destroy anything in its path if you have the Magic to finance it. This Upgrade nearly doubles the number of available spaces the Tower can target, and removes the “blind spots” that are the bane of standard Assault Towers. Since the second shot (if you pay for it) is targeted separately from the first, you can kill two Units in a turn or else destroy a blocker and then hit the real target. I typically prefer to put the Turret Upgrade on a normal Assault Tower than on Grundor’s Tower, but putting this on GT has won me games and is the best way to totally dominate your opponent’s half of the board with the huge damage potential available to you if you have the proper funding.
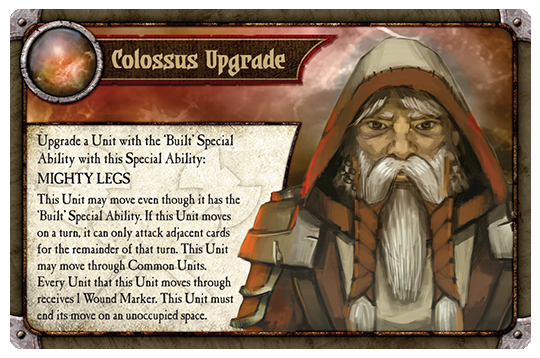
Colossus Upgrade - This Upgrade definitely invokes the funniest mental image of the three, and is a fan favorite for many Bolvi players. Removing the immobile handicap of the Towers is a huge benefit, as is the added bonus of TRAMPLE. Many players will automatically pair this with Grundor’s Tower to create a 7-cost, 2AV version of Miti Mumway that has Range on turns that it doesn’t choose to move, and can be repaired via Architects or protected via Strengthen Structures. I’m certainly fond of making Grundor the Colossus, but it’s not an instant play for me as I think certain board states make Turret or Mortar the more strategic play for the big boy. Be wary of marching Colossal Grundor deep into enemy territory by itself, as even those 8 Life can disappear quickly without support if you don’t quickly procure the victory. You can be quickly find yourself down a net of 10 Magic (-6 Cost, -1 for GT, -1 for Colossus Upgrade, +2 for your opponent), so make sure that march guarantees the win. Every turn you should decide whether the Range or the Movement is more worthwhile -- I often will TRAMPLE if it’s available and otherwise like to shoot from afar, although the situation varies. An Assault Tower with the Colossus Upgrade can help crowd control enemy Commons and advance your position nicely, but it can die quickly if you’re careless and doesn’t strike the same fear into your opponent’s heart as Grundor’s Tower does when it springs forth its MIGHTY LEGS.


